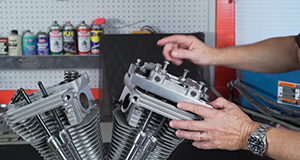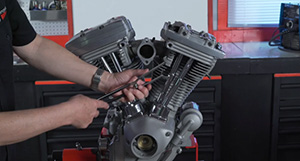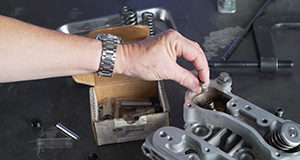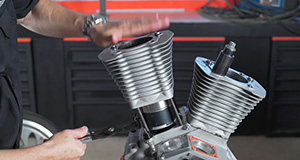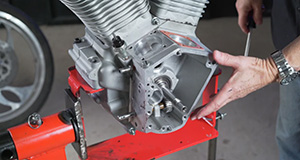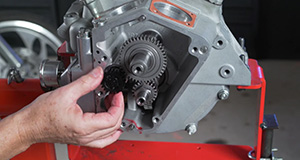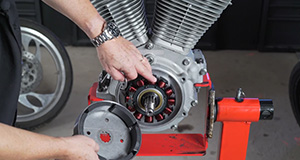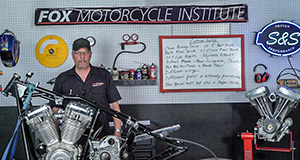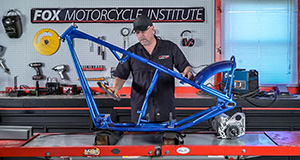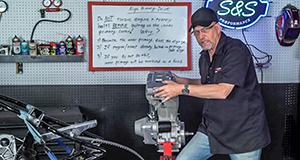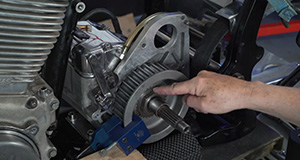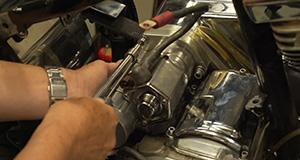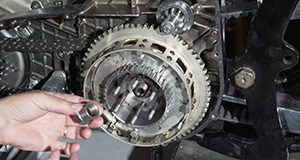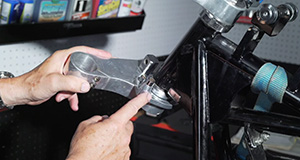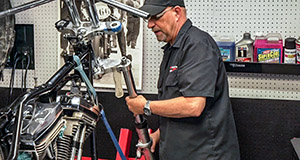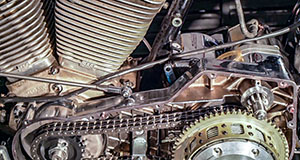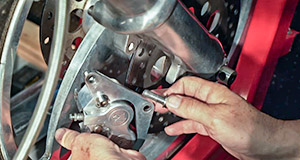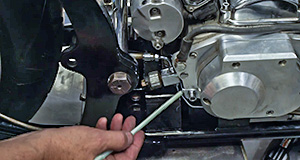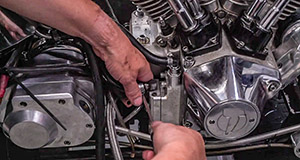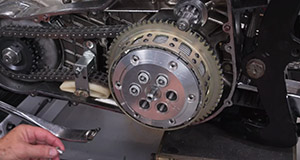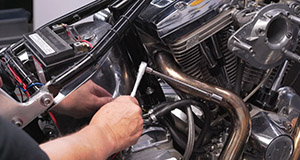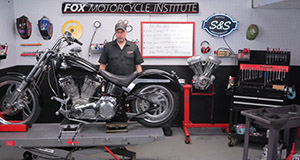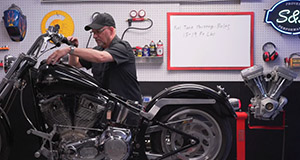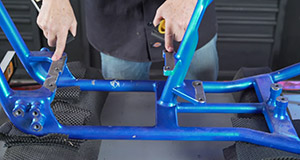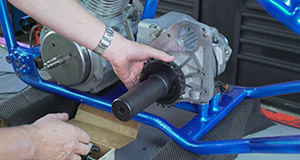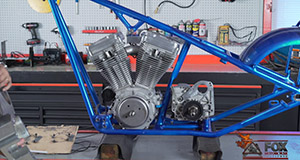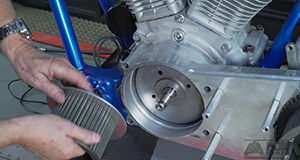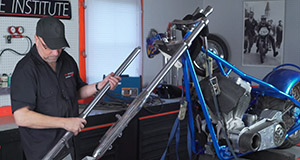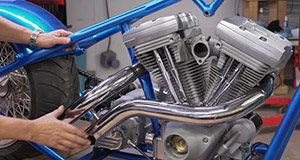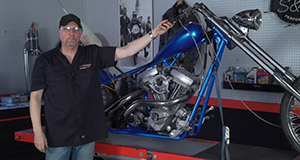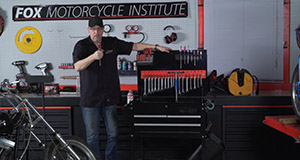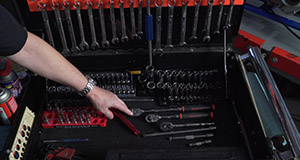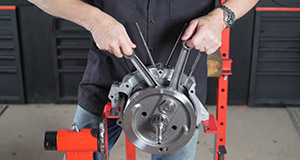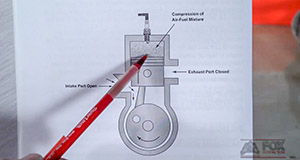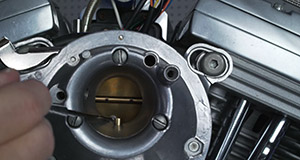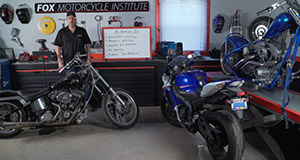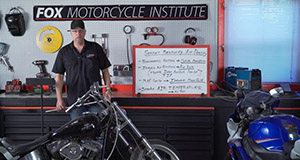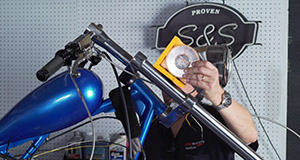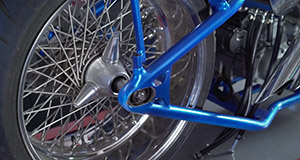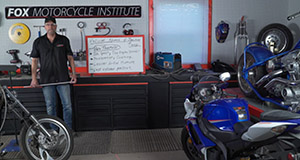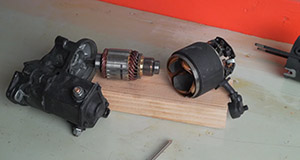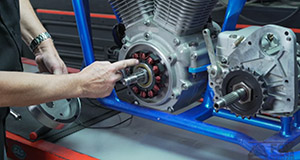
Watch PROFESSIONAL hands-on
workshops with VideoPass
A VideoPass is an Annual Membership to watch the online instructional videos at Fox Motorcycle Institute.
Have detailed instructional videos at your fingertips for ONLY $99 PER YEAR.
Have detailed instructional videos at your fingertips for ONLY $99 PER YEAR.
Scroll down to preview ALL of our instructional videos!
VIDEOPASS
Buy a VIDEOPASS for $99, and your knowledge of motorcycle mechanics will increase exponentially!
Our instructional videos contain the same information we have taught for over 14 years in our intensive 4 day Hands-On Workshops at our shop in Ohio: Motorcycle repair, Harley engine overhaul, Harley engine building, custom motorcycle building, troubleshooting, and video lectures on the 28 textbooks that go with our professional motorcycle mechanics courses.
Years of painstaking work went into the production of these high-quality instructional videos. You will not be disappointed!
All mechanical procedures and motorcycle mechanics theory is covered step-by-step, and part-by-part on all our videos. No steps or parts are skipped. Important theory and technical concepts are taught in great detail.
We take the mystery out of learning motorcycle mechanics. Tired of watching instructional videos where instructors talk forever and don’t get down to showing you what to do? We don’t do that. We’re not going to waste your time like that.
We don’t just “tell you” what to do, WE SHOW YOU HOW TO DO IT! Our philosophy is this: “If you can VISUALIZE IT, you can DO IT!” If you can watch procedures performed right in front of you, it becomes a “no-brainer”. You can then perform the procedures yourself. Just like an apprentice, you learn by watching someone with years of real-world experience.
Our extensive list of instructional videos also includes “Classroom Lectures” on most of our 28 textbooks on motorcycle mechanics theory, troubleshooting, repair, and many related topics.
Buy a VIDEOPASS annual subscription and watch step-by-step instructional videos from our workshops,classroom lectures from our courses, and many other videos from our huge archive.
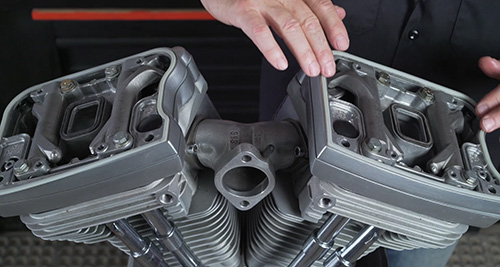
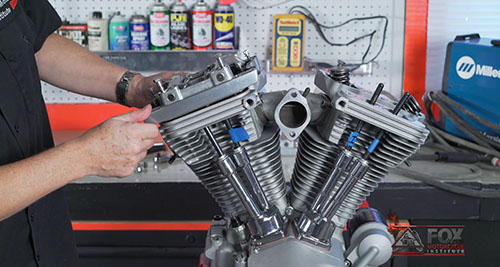
Harley Engine Top-End Teardown & Reassembly
These videos instruct the student in proper teardown and rebuild of the top-end. This is a “dry-run” in preparation for the Top-end Overhaul video series on overhauling engines. These videos give the student a comfort level, and a slower “ramp up” in understanding the issues involved with top-end teardown, and top-end rebuild, before starting to learn top-end overhaul procedures. Otherwise, we felt that the student would be overwhelmed by combining engine theory, top-end teardown, detailed top-end overhaul procedures, and top-end reassembly all in one huge video series.
Harley Engine Top-End Teardown – Video 1 29:37
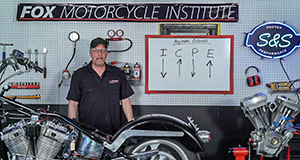
This video covers disassembly of the rocker box covers and gaskets, and the rocker boxes. Learning how to turn over the engine to the correct stroke is covered in detail prior to removing rocker box fasteners. This prevents stripping the rocker box fastener threads upon removal. Basic engine firing order and valve positioning is covered in detail pursuant to removing each individual rocker box.
Harley Engine Top-End Teardown – Video 2 23:56
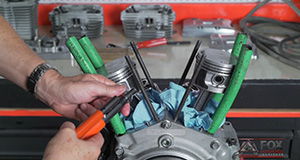
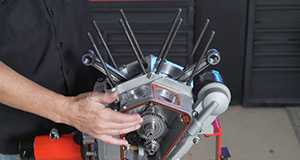
Final rocker box removal, removal of pushrods, pushrod color coding, use of pushrod templates. Removal of cylinder heads and head gaskets. Removal of cylinders. Removal of pistons and wrist pins. Piston ring gap locations discussed. Special positioning of second compression ring covered.
Harley Engine Top-End Reassembly – Video 1 20:50
Wristpin fit into wristpin bushing is discussed before installation of pistons. Special wrist pin clip tool is used to avoid excessive time and aggravation with installation of wrist pin clips. Installation of cylinders and base gaskets. Use or ring compressor as well as hand installation of piston rings into the cylinders. Head bolt torqueing sequence. Head bolt torque specifications. Marking head bolts for the 90 degree turn.
Harley Engine Top-End Reassembly – Video 2 21:32
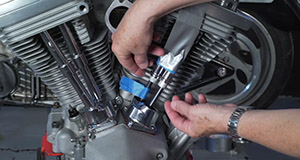
Installation of pushrods and pushrod covers. Use of proper pushrod color coding. Getting the engine to the proper position with cam lobes down in preparation for installation of each rocker box. Installation of rocker boxes. Proper fastener sequence and torque specifications for the rocker box fasteners. Discussion of pushrod preload in the valve train. Proper installation of rocker box spacer with umbrella valve in proper location. Install of rocker box covers. Use of special tool for compression of pushrod cover springs to ease the job of pushrod cover installation. Discussion of changing engine position for cam lobe positioning when the engine is already in the motorcycle, and not on an engine stand.
Harley Engine Top-End Overhaul
Harley Top-End Overhaul – Video 1 18:53
Disassembly of the rocker box covers, rocker box spacers, and rocker boxes. Getting the engine to proper engine stroke to prevent stripping rocker box fasteners during removal. Removal of pushrods and pushrod covers.
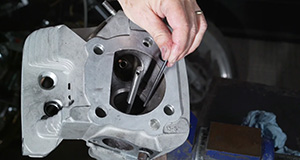
Removal of cylinder head. Removal of cylinder head valve springs, valve spring keepers, and upper valve spring collar using valve spring compressor. Removal of intake and exhaust valves, valve seals, and lower valve spring collars from the cylinder head.
Harley Top-End Overhaul – Video 2 13:33
Measuring valve stem to valve guide clearance. Measuring valve guide inside diameter with plug gauges. Measuring valve stem diameter with Snap-on electronic micrometer. Comparing measurements with service manual “factory specifications” and “service wear limits”.
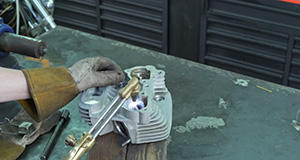
Using heat and cold to remove or install “interference fit” parts such as the valve guide in the cylinder head. Remove exhaust valve guide from cylinder head using heat and special tool from JIMS. Remove intake valve guide.
Harley Top-End Overhaul – Video 3 16:51
Fitting valve guide to valve guide bore in the cylinder head. How to measure the valve guide bore in the cylinder head. Installing oversize valve guides if necessary. Kibblewhite and Rowe Machine valve guides. Valve guides that are pre-bored and honed, vs. valve guides that must be reamed out and honed manually.
Magnese bronze intake valve and exhaust valve guides in various oversize’s. Measuring valve guide bores with a snap gauge. Analyzing measurements to see whether an oversize valve guide is required. Freezing intake valve guide, heating cylinder head, and installing intake valve guide with special tool. Manually reaming and honing a Kibblewhite intake valve guide.
Harley Top-End Overhaul – Video 4 22:20
Measuring exhaust valve guide bore in cylinder head. How to compute the outside diameter required for the new replacement valve guide. Installing the exhaust valve guide with JIMS tool.
Demo of the Kibblewhite valve guide reaming tool, and valve guide flex hone. Reaming and honing of the new valve guide. Discussion of conflicting measurements using snap gauges and what to look for when dubious measurements are encountered.
Discussion of a problem where a valve guide was installed that was too big for the bore hole. Troubleshooting problems with valve guide measurements and installation.
Harley Top-End Overhaul – Video 5 15:20
Introduction to the Neway valve seat cutting tool and Neway’s unique place in motorcycle cylinder head reconditioning. Discussion of why valve seats distort at searing combustion chamber temperatures – especially in air-cooled engines where exhaust valves get almost no cooling. Discussion of the various forms of distortion that valve seats suffer from. Discussion of the results of distortion and how engine performance in compromised.
Discussion of valve seat and valve face angles.
Harley Top-End Overhaul – Video 6 16:17
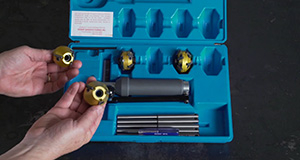
Detailed look at the parts of the neway valve seat cutting tool kit. Demo of how the pilots fit in the valve guides. Discussion of pilot diameters. Discussion of goals of valve seat cutting. Discussion of centerline axis. Valve seat cutting fluids.
Harley Top-End Overhaul – Video 7 16:13
Detailed valve seat cutting instructions from Neway. Cutting of the 60 degree, the 31 degree and the 46 degree valve seats. Inspecting the valve seats after cutting and what to look for.
Using Prussian Blue to show where the ring mark hits on the valve face and how thick the ring mark should be per the service manual specifications. Instructions of where to continue cutting if the ring mark is too high, or too low on the valve face. Hands-on cutting of the first valve seat.
Harley Top-End Overhaul – Video 8 19:20
Hands-on cutting of the valve seats. Initial problems to look out for during valve seat cutting. Checking where the 46 degree valve seat contacts the 45 degree valve face by using Prussian Blue. Measuring the width of the contact ring (the contact pattern) with a micrometer.
Valve cutter tool setup considerations and more problems to look out for when cutting valve seats. Harley Davidson service manual valve seat cutting instructions – these are slightly different than the Neway instructions.
Review of what to do if the contact pattern is located too high on the valve face or too low on the valve face.
Harley Top-End Overhaul – Video 9 18:19
Special overhaul issues with worn cylinders and worn pistons in the Evolution engine. How to go about dealing with these special issues that are particular to the Harley Evolution engine with respect to boring out cylinders and fitting oversize pistons. Service manual instructions are discussed.
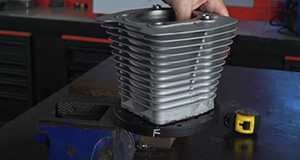
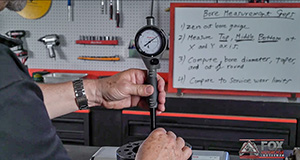
Cylinder bore sizes after boring and honing: stock bore size, stock bore size service wear limits, first and second overbore sizes. Use of torque plates. Using bore gauge to measure cylinder bore, cylinder taper, and cylinder out of round.
Harley Top-End Overhaul – Video 10 14:25
Installation of cylinder torque plates. Torqueing down cylinder torque plates. Setting up a bore gauge by using an outside micrometer and factory bore specifications. How to read the fine markings of a “manual” outside micrometer – (a non-electronic micrometer).
Harley Top-End Overhaul – Video 11 17:42
Setting up the bore gauge using a contact point (anvil) and spacers. How to use a Snap-On bore gauge chart.
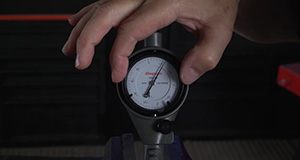
Understanding how a bore gauge works and what it really measures. How to zero-out the bore gauge with an outside micrometer. How to read the markings on the bore gauge dial. Understanding bore gauge increments.
Issues with setting a bore gauge with an outside micrometer. Factory specs vs. real world considerations. An alternative method of zeroing out the bore gauge without using an outside micrometer is discussed.
Harley Top-End Overhaul – Video 12 16:41
Measuring bore at the X and Y axis. Hands-on taking of bore measurements. How to compute bore diameter, bore taper, and bore out of round. Comparison of bore measurements to service manual “service wear limits”. How to evaluate results of bore measurements.
Harley Engine Bottom End Teardown
Harley Bottom End Teardown – Video 1 22:56
Discussion of why you would need to understand how the bottom end works, and what projects can be accomplished in the bottom end. Some projects could entail replacing worn lifters, a worn or shattered camshaft bearing, installation of a high performance camshaft, or installation of a big bore kit that might include a new flywheel, cylinders, pistons, cylinder heads, adjustable pushrods, a new camshaft, etc..
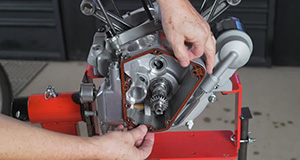
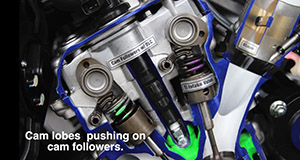
Removal of gear case cover and discussion of engine timing marks on the camshaft, pinion shaft and breather gear is covered. One lifter block and lifters is removed so that engine can be turned over to show the rotation of cam lobes as they push the lifters up and down. Discussion of oil holes that feed oil through the lifters to lubricate the top end.
Harley Bottom End Teardown – Video 2 20:47
Removal of the breather gear, camshaft and pinion gear. Demo of special JIMS tool to lock down pinion gear for nut removal. Removal of oil pump outside cover/housing, oil pump drive gear and oil pump idler gear. Removal of woodruff key that holds drive gear in place on shaft.
Removal of oil pump inside housing, oil pump return gears and woodruff key. Removal of rotor and stator. Removal of engine case bolts and use of a template for the bolts.
Harley Bottom End Teardown – Video 3 19:43
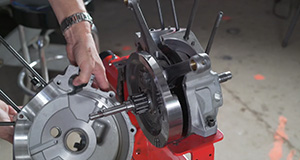
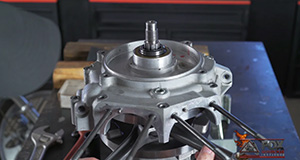
Remove all case bolts. Use of bolt template. Splitting the engine cases. Demonstration of how the flywheel and common crankpin works in the Harley V-twin engine. Pinion shaft bearing removal. Using bearing press to remove the flywheels from the left case half.
Using the Rowe flywheel jig for working on the flywheels. Removal and safe keeping of the main bearing machined spacer. Breaking the sprocket shaft flywheel from the crankpin. Rule for hitting the pinion shaft flywheel. Removal of connecting rods. Removal of connecting rod bearings. Breaking loose a stuck crankpin.
Harley Engine Building
Comprehensive engine building from a bare crankpin to the finished engine! Building the entire engine bottom end and top end!
Harley Engine Building – 1 – Balancing Flywheels Part 1 21:50
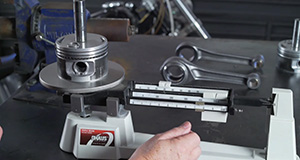
Balancing flywheel rotating weight using scale and mathematic calculation format provided by S&S cycle.
Balancing flywheel reciprocating weight using scale and mathematic calculations.
Scale measurements involve weighing the connecting rods, rod bearings, crankpin, pistons, and piston wrist pins. How to use the flywheel balancing kit from S&S cycle.
Harley Engine Building – 2 – Balancing Flywheels Part 2 15:35
Filling out the static balancing sheet weights in order to compute the weight of the bob weight needed for flywheel balancing. Using the S&S balancing kit to balance the sprocket shaft flywheel and the pinion shaft flywheel.
Harley Engine Building – 3 – Flywheel Assembly & Truing 29:25
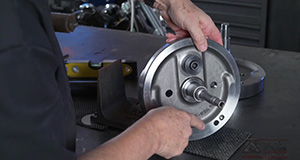
Assembling the flywheels, crankpin, main bearings and connecting rods on the Rowe flywheel jig. Getting the connecting rods facing to right direction. Clamping the flywheels using the Rowe flywheel clamp.
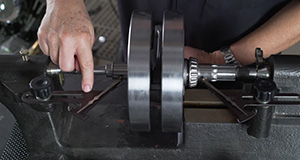
Going over the flywheel torquing procedures and steps on the dry-erase board. Torquing the flywheel crankpin nuts. Using a truing stand to check the run out of the flywheel shafts.
Going over the procedure for truing the flywheel if they are not properly aligned and trued with only the clamp. Performing the actual procedure of straightening out the flywheels in a situation where they are not properly aligned, and placing them back into the truing stand to check that run out problems were corrected.
Harley Engine Building – Video 4 19:13
This video continues the work performed in the video called “Flywheel Assembly and Truing”. It starts with finishing the job of torqueing the flywheels.
Next is inserting the “left case half” main bearing with engine building lube and tapping on the bearing seal/ cover. Putting on the main bearing spacer. Laying the left case half over the sprocket shaft. Pulling the flywheel assembly into the left case half by using a special JIMS tool.
Putting on the pinion shaft bearing with duckbill pliers. Going over engine case bolt torqueing procedures. Putting sealing adhesive between the case half’s prior to mating up the two cases. Installing and torqueing all case bolts.
Harley Engine Building – Video 5 20:06
Fitting piston rings in pistons with correct ring gap locations. Proper position of the second compression ring with chamfered edge. Checking piston ring end gap and side play. Installing pistons onto connecting rods. Installing cylinders. Use of ring compressor tool and hands only to compress rings during cylinder installation.
Harley Engine Building – Video 6 21:09
Install cylinder heads and gaskets. Cylinder head bolt torque sequence and torque specifications. Final case bolts torque spec per service manual. Install oil pump return gears and inner oil pump housing. Install oil pump drive gears and outer oil pump housing.
Harley Engine Building – Video 7 20:53
Install oil pump pressure gauge. Install oil pump worm gear and pinion gear. Lock down pinion gear with special JIMS tool. Torque pinion gear nut to specification.
Install camshaft and shim. Install breather gear and breather gear spacer. Align all timing marks on camshaft, pinion gear and breather gear so engine timing is correct. Install gear case cover and gasket.
Install front lifter block, lifter block gasket and lifters. Use magnet to hold lifters. Use lifter block alignment pins. Torque lifter block bolts. Repeat same procedure for the rear lifter block and lifters.
Install pushrods. Get engine to position where cam lobes are down for front cylinder. Install front rocker box and gasket. Torque rocker box fasteners in proper sequence. Discuss preload.
Harley Engine Building – Video 8 17:05
Finish torquing front rocker box fasteners. Turn engine over so lobes on the cam are down for rear cylinder pushrods. Install rear rocker box and gasket.
Install rear and front rocker box spacers and gaskets. Locate umbrella valves in correct position. Install rocker box covers and torque screws. Install pushrod cover clips with Motion Pro special tool.
Install stator and rotor. Install spark plugs. Install rotor cup. Install oil filter and oil lines to filter. Install intake
manifold.
Custom Harley Motorcycle Building
Building a custom Harley from a bare frame to the finished motorcycle!
Custom Harley Build – Video 1 16:31
Important introductory remarks. Safety issues. How to lift engine into frame. Frame and chrome protection. Building sequence. Torque specs. Torquing procedures. Loctite uses.
Custom Harley Build – Video 2 17:46
Loctite issues. Nyloc nuts. Black bolts vs. chrome. Bolt, nut and washer grades. Testing frame integrity with levels. Engine, transmission, regulator, and “bare metal” mounting requirement. Getting a good ground for electrical parts. Star washers. Removing frame paint and powder coat.
Custom Harley Build – Video 3 13:42
Seven steps to assemble and align the primary drive which is the engine and transmission. Inner primary torque specs.
Custom Harley Build – Video 4 21:08
How to attach the transmission sprocket (the final drive belt pulley) when using a belt for the final drive. Torquing procedure. Using special JIMS tool for transmission sprocket nut. Using special JIM’s tool to lock down transmission belt pulley for torquing. Removing the transmission shaft bushing if using a 3 inch open belt drive “motor plate” instead of a stock inner primary cover – using the JIMS special tool for removing or installing the bushing.
Custom Harley Build – Video 5 16:43
Sizing inner primary cover bolts. Installing the inner primary cover. More discussion on how to perform the seven steps to install the inner primary cover, and use it to align the primary drive – the engine and transmission.
Custom Harley Build – Video 6 20:45
Removing the inner primary cover and torquing engine-to-frame and transmission-to-frame bolts that could not be accessed earlier. Installing the rear drive belt and swing arm pivot axle. Overview of rear axle, axle spacers, and rear brake caliper bracket (also a spacer). Aligning the final drive from transmission to rear wheel. Final drive components. Rear axle components. Seven final drive alignment and torquing steps.
Custom Harley Build – Video 7 17:09
Final drive alignment procedures continued. Measuring for wheel spacers. Centering the rear wheel in the frame. Installing rear axle, rear wheel spacers, rear brake caliper bracket. Adjusting axle position with rear axle adjusting screw (bolt). Centering the rear wheel to ride straight and not cocked. Torquing rear axle nut. Securing rear brake caliper bracket to tab on frame. Checking belt tension.
Custom Harley Build – Video 8 14:19
Review of where we are now and how we got there. Reinstalling inner primary cover. Wet torque specifications. Torquing inner primary cover bolts for final time. Bending down inner primary bolt locking tabs.
Custom Harley Build – Video 9 15:06
Going over starter and jackshaft components. Installing starter and jackshaft. Examining the chain sprocket that goes on the sprocket shaft (engine shaft). Examining the clutch hub, ring gear, and primary drive chain. Alignment of the sprocket shaft chain sprocket teeth, with the teeth on the back side of the clutch basket before installing the primary drive chain. Using the Motion Pro special alignment tool to align the teeth.
Custom Harley Build – Video 10 21:34
Installing the engine shaft (sprocket shaft) chain sprocket, the primary drive chain, and the clutch hub basket with ring gear. Aligning the primary drive chain. Installing the sprocket shaft nut. Positioning and tightening down the chain tensioner. Installing clutch plates, pressure plate, clutch spring cups, clutch springs, clutch spring nuts.
Custom Harley Build – Video 11 15:40
Neck cup installation. Neck cup bearing race installation. Special JIMS tool for installing neck cups and bearing races. Fork stop installation and types of fork stops. Handlebar dampeners. Installing the triple trees (fork clamps).
Custom Harley Build – Video 12 14:58
Installing handlebar risers. Installing handlebars. Installing front forks. Installing front wheel, front axle, and front wheel spacers. Torqueing front axle nuts.
Custom Harley Build – Video 13 16:13
Installing rear brake master cylinder, rear brake pedal, and right foot peg. Install transmission shift lever, shift rod, and left foot peg. Install kickstand. Discussion about front brake caliper installation, brake caliper shimming, bolts, nylock nuts, and torque specs.
Custom Harley Build – Video 14 17:04
Close up look at front brake caliper, front brake caliper bracket, and mounting bolts. Installation of front brake caliper and bracket. Front brake caliper shimming. Torqueing front brake caliper bracket to fork leg tabs. Attaching rear brake caliper to the rear brake caliper bracket. Examining front brake fluid reservoir, front brake lever, and dual front brake caliper brake lines. Discussion of brake lines and fittings, brake line measurements, and banjo bolts. Discussion of the front brake master cylinder bore size required to be able to push dual front brake calipers, as opposed to only clamping down on one front brake caliper.
Custom Harley Build – Video 15 18:26
Attach front brake lines. Attach rear brake line. Examine rear brake light switch housing integrated into rear brake line. Examine center fill oil tank fittings for oil drain, oil feed, oil return, and breather functions. Attach oil tank and oil lines.
Custom Harley Build – Video 16 10:07
Finish attaching oil lines. Further discussion of oil tank, oil lines, and oil destinations. Oil breather system discussion. War story of what happens when oil lines are attached incorrectly. War story of what happens when you overfill the oil tank. Getting the right oil tank that fits your frame and does not block starter main terminal.
Custom Harley Build – Video 17 13:23
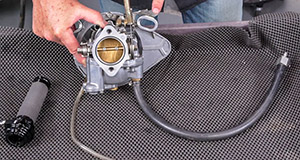
Discussion of S&S “E” carburetor adjustment screws: idle speed screw, idle mixture screw, and accelerator pump screw. Close-up demonstration of how an S&S “E” carb works. Close-up examination of “E” carb adjustment screws.
Custom Harley Build – Video 18 18:42
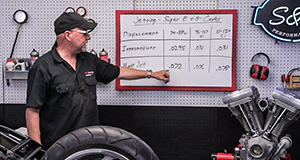
Teardown of an S&S “E” carburetor. Examination of main jet, intermediate jet, accelerator pump rod, float bowl. Discussion of S&S fuel jet sizes for engines with different displacements. Discussion of Super “E” and Super “G” carbs. Discussion of how shorty “drag pipes”, and too big of a carburetor bore can hinder starting, venturi vacuum speeds, and cause engine to run hot because of excess scavenging caused by drag pipes.
Custom Harley Build – Video 19 23:43
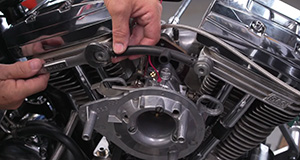
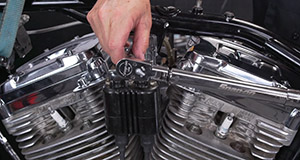
Install of intake manifold. Assembling the S&S “E” carburetor after it had been disassembled. Setting the idle speed screw, idle mixture screw, and accelerator pump adjustment screws. Attaching the carburetor to the intake manifold. Attaching the crankcase breather hose from the cylinder heads to the carburetor. Torquing down intake manifold screws. Lubricating throttle cable.
Custom Harley Build – Video 20 9:11
Attaching the clutch cable to the clutch lever. Attaching clutch lever to handlebars. Attaching handlebar grips. Installing coil, spark plug cables, and motor mount.
Custom Harley Build – Video 21 17:30
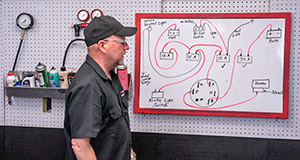
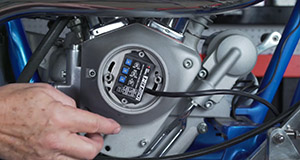
Discussion of Pro-One side mount “chopper” wiring box and all the electrical wires and circuit breakers. Discussion of where all the wires go to on the engine, transmission, starter, and battery. Simple key switch wiring schematic discussed on the dry-erase board. Discussion of where all the wires go to after being attached to the key switch.
Custom Harley Build – Video 22 16:58
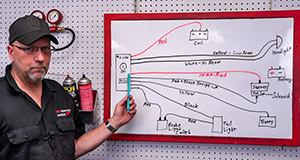
Discussion of the detailed wiring schematic of the Pro-One side mount “chopper” wiring harness on the dry-erase board. Every wire and every wire destination is discussed. Detailed discussion of the wires and circuit breakers inside the Pro-One wiring box, how they are hooked up, and where they go. This is turnkey, basic, bare-bones motorcycle wiring that you will learn. Horn, turn signals, and front brake light switch hook-up is NOT covered.
Custom Harley Build – Video 23 19:12
Further discussion of details of Pro-One wiring harness. Discussion of where on the frame to attach electrical components such as coil, key switch, headlight high-low switch, and motor mount. Discussion of current suppliers of custom wiring harnesses such as Namz and Thunder Heart.
Custom Harley Build – Video 24 11:24
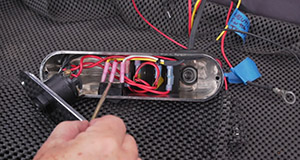
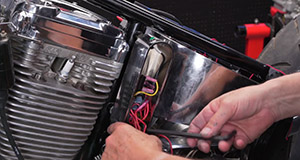
Attach Pro-One wiring box to motorcycle frame. Examination of where each wire goes that is coming out of the Pro-One wiring box. Examination of where ignition wires attach to the three connectors on top of the single-fire coil. Examination of wires that go under the rear fender and to the rear tail light. Examination of how the license plate bracket and tail light attaches to the rear fender. Examination of how rear fender struts attach to frame and rear fender. Using heat gun to shrink down the “shrink wrap” over solder joints on the front headlight wires. Examination of the wires that attach to the positive and negative battery poles.
Custom Harley Build – Video 25 14:12
Installation of the clutch plates into the clutch hub. Smearing primary oil onto the clutch plates. Install of the clutch pressure plate, clutch spring cups, clutch springs, and clutch spring nuts. Adjusting the clutch: adjusting the clutch rod nut, the clutch cable tensioner nuts, and clutch pull distance on the clutch lever.
Custom Harley Build – Video 26 24:14
Attaching wires to the positive and negative terminals of the battery. Hooking up the exhaust pipes. Discussion of attaching the outer primary cover off-camera. Pouring in one quart of primary crankcase oil. Attaching the primary inspection cover and gasket. Checking transmission oil stick and whether we have enough tranny oil in the transmission. Pouring in the right type of engine oil into the oil tank. STARTING THE ENGINE with an auxiliary gasoline tank before attaching the real gas tanks! Discussion of how to bleed brakes. Leveling the front brake reservoir during brake bleeding so the brake fluid does not spill out of the reservoir while the brake reservoir cap is off.
Custom Harley Build – Video 27 18:59
Examination of “Fat Bob” gas tanks, connecting hoses between the two tanks, fuel petcock, and fuel hose to the carburetor float bowl. Use of Snap-On hose pinchers when draining gas out of the tanks if you remove the tanks from the bike. Locating the tabs on the frame where the Fat Bob gas tanks will be bolted to the frame. Fuel line from gas tanks to carburetor, and how the “fuel line protector hose” protects the fuel line from the heat of the cylinders. Mounting the Fat Bob gas tanks to the frame. Examination of Fat Bob gas tank fittings.
Custom Harley Build – Video 28 11:38
Attaching the “Fat Bob” gas tanks to the frame. Examination of how a Pingel petcock works in the ON, RESERVE, and OFF positions. BIKE START UP! Further discussion of petcock positions and how it can affect your start up.
Adjustable Pushrods
Installation and adjustment of adjustable pushrods.
Pushrods Part 1 – Adjustable Pushrods 23:07
Discussion of “what are adjustable pushrods?” Valve train discussion: Camshaft, lifters, pushrods, rocker arms, valves. Overhead camshaft and camchain valve trains. Why use adjustable pushrods? Important theory on getting the valve train positioned in order to install adjustable pushrods.
Pushrods Part 2 – Adjustable Pushrods 24:32
Close look at all four cam lobes on the Harley Evolution engine camshaft. Using painters tape and watching pushrod movement to tell which stroke the engine is on – the goal being to set engine with the cam lobes down. Watching rocker arm movement to also determine what stroke the valves are on. Eleven step procedure for installing adjustable pushrods.
Pushrods Part 3 – Adjustable Pushrods 19:24
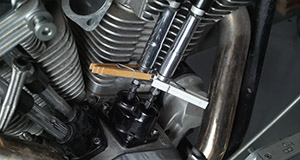
Watching a set of JIMS roller rocker arms to indicate where the valves are, along with the lobes on the cam, for purposes of getting the engine set up for adjusting the adjustable pushrods. Using a straw to locate TDC on the compression stroke. Using clothes pins to pin up the pushrod covers. Marking a flat on the pushrod to know where you are during adjustment rotations. Using 3 wrenches to adjust the front and rear cylinder adjustable pushrods. Examining the different lengths of the pushrods for the rear intake, rear exhaust, front intake and front exhaust.
Custom Chopper Building
Building a chopper from a bare frame to the finished motorcycle.
Chopper Build – Video 1 23:26
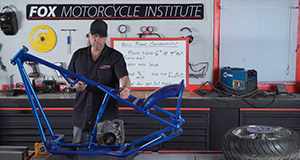
Frame neck rake considerations before buying a frame. Cut-down front shock requirements with some “bobber frames”. Rear tire width considerations and frame requirements for tire widths.
Rigid vs. “softail” type frame suspension considerations. Custom rear fender fabrication requirements vs. bolt-on rear fender. Frame top tube and down tube stretch considerations. Axle diameters and hidden axle blocks. Bung requirements for mounting gas tank, oil tank, fenders.
Chopper Build – Video 2 25:06
Using levels to evaluate the quality of a frame build after purchase and before starting the build. Evaluation of engine mounts, transmission mounts and bottom frame rails after purchase of frame. Discussion of shimming the engine or transmission.
Discussion of whether to paint or powder coat a frame. Pros and cons of powder coating. Problems with bondo and powder coating. Problems matching paint. Fat tire frame offsets. Left-side and right-side drive frames. Understanding powertrain offset measurements with respect to tire widths.
Chopper Build – Video 3 20:32
Preliminary discussion of primary drive alignment of engine and transmission. When to shim if necessary. When to send the frame back if shimming becomes excessive. Inner primary cracking with non-shimmed drive trains.
Getting rid of paint or powder coat to avoid phantom electrical problems and endless headaches after the motorcycle is built. Discussion of “what constitutes a ground” – critical to your understanding of how electricity functions in motorcycles (and automobiles). Methods of having your painter or powder coater paint around engine and transmission without unnecessary headaches.
Chopper Build – Video 4 21:08
Fat tire offsets using aftermarket transmission plates, offset transmission chain sprockets, and consideration of engine and tranny offsets already built into a frame. How to lift the engine into the frame on the correct side of the frame. Using special padding or tape to prevent chipping frame paint during install of engine and during the bike build. Attaching the regulator/rectifier. Use of grade 8 nyloc nuts and bolts. Transmission install.
Removing the transmission shaft bushing on stock tranny if installing a belt drive final drive. How to use the special JIMS tool to remove the bushing. How to use the special JIMS tool to tighten the transmission drive sprocket nut that fits deep over the long transmission shaft.
Chopper Build – Video 5 21:54
Primary drive installation procedure with a BDL belt driven primary drive. Proper steps for aligning the engine and the transmission with the motor plate.
Checking for possible shimming needs of engine and transmission after primary drive is aligned and torqued with motor plate.
Torquing engine and transmission nuts. Removing motor plate for final drive alignment, and also to have access to torque final engine and transmission bolts that could not be reached during prior torquing sequence.
Resolving the gap problem between the engine and motor plate due to offset transmission plate. Certifying the four motor plate bolts going into the engine that must be longer than the bolts that came with the kit. Avoiding the danger of round bolt holes drilled into engine case. Where to buy the bolts.
How to remove a stubborn motor plate even if all the bolts have been removed.
Introduction to the special 250 rear tire used on this bike build. Left side brake rotor for sproter brake usage. Problems with the sproter brake system.
Chopper Build – Video 6 20:33
Preview of how the rear axle, axle spacers, and sproter brake look, and fit, in the frame before the rear wheel is installed. How to measure for wheel spacers.
Overview of the 4 main goals to be accomplished in final drive alignment. How to align the final drive from the transmission to the rear wheel. Using offset transmission sprockets, if necessary, to resolve big headaches in rear wheel alignment. Where to buy them.
Final re-installation of the motor plate for the last time. Using front drive belt pulley (or front drive chain sprocket) spacers on the sprocket shaft. Install of front and rear belt pulleys. How to align the pulleys. Acquiring an extended front pulley insert due to the transmission offset. How to install the front belt pulley when the belt has not yet stretched and it looks impossible to get the front pulley and belt onto the sprocket shaft. Using impact wrench and Loctite to install sprocket shaft nut.
Chopper Build – Video 7 20:43
Install of clutch hub nut. Checking for presence of clutch rod. Installation of clutch plates. Installation of the pressure plate and clutch bolts and springs. Installation of the starter. Installation of the jackshaft. Installation of the neck cups. Installation of the neck cup bearing races. Using the special JIMS neck cup installer tool.
Overview of how the internal fork stop works with the triple clamps. Installation of the triple clamps. Installation of the handlebar risers. Using wedges to open fork clamp for installation of the fork legs. Installation of front forks. Installation of front wheel, front axle, and front wheel spacers.
Chopper Build – Video 8 25:29
Installation of exhaust pipes. Information on the exhaust flange ring and need to buy it. Information on exhaust pipes for fat tire bikes. Installation of the oil tank. Using bungs to suspend the oil tank from the frame. Installation of the handlebars. Carburetor installation. Installing the forward controls. Gas tank install. Headlight install. Clutch lever and left grip installation. Brake lever and brake fluid reservoir installation. Rear tail light and license bracket installation. Front brake caliper install. Front brake shimming. Building a custom seat pan the easy way.
Chopper Build – Video 9 3:12
Installation of wire-plus custom wiring module that includes the engine support bracket, ignition switch, and headlight high/low beam switch. Module also includes place to locate the ignition coil and ignition wires. Firing up the engine.
Motorcycle Technology – Part 1
Instructional Videos On Textbook Chapters and Other Topics
Tools, Fasteners, Torquing, Safety – Part 1 21:31
Tools, Fasteners, Torquing, Safety – Part 2 20:48
The Four-Stroke Engine Part 1 – Video 1 23:39
The Two-Stroke Cycle Engine 13:16
Fuel Systems – Carburetors – Part 1 13:12
Fuel Systems – Fuel Injection – Part 1 21:16
Motorcycle Technology – Part 2
Instructional Videos On Textbook Chapters and Other Topics
The Four-Stroke Engine Part 2 – Video 1 26:39
Fuel Systems – Fuel Injection – Part 2 12:56
Ignition Systems – Part 1 21:44
Frames, Suspension, Forks and Shocks 19:33
Wheels, Tires and Brakes 14:13
Motorcycle Technology – Part 3
Instructional Videos On Textbook Chapters and Other Topics
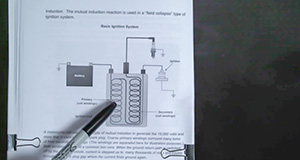
Ignition Systems – Part 2 18:57
Starting System and Starter Motors 6:41
Engine Cooling Systems 16:08
Oil and Lubrication 23:31
Exhaust Systems and Emissions 7:31
Advanced Course – Electrical Theory
Instructional Videos On Textbook Chapters and Other Topics
Electrical Theory – Part 1 – Video 1 24:28
Electrical Theory – Part 1 – Video 2 19:59
Electrical Theory – Part 1 – Video 3 15:38
Electrical Theory – Part 2 – Video 1 21:25
Electrical Theory – Part 2 – Video 2 8:07
The Battery – Part 1 13:43
The Battery – Part 2 17:52
The Battery – Part 3 10:59
The Battery – Part 4 6:18
Charging Systems 5:05
Have detailed instructional videos at your fingertips for ONLY $99 PER YEAR.
Have detailed instructional videos at your fingertips for ONLY $99 PER YEAR.
Quicklinks
Online Motorcycle Repair Course
Online Motorcycle Repair Classes
Online Motorcycle Mechanic Classes
Online Motorcycle Technician Training
Online Motorcycle Repair School
Motorcycle Repair School
Motorcycle Mechanic Training School
Motorcycle Mechanic School Online
Motorcycle Mechanic School
Harley Davidson Motorcycle Mechanic School
Do you work better with "hands-on" training. Click here to learn more about our in-person classes.
Contact
Fox Motorcycle Institute
233 Illinois Avenue
Westerville, Ohio 43081
614-882-5975
fox592@icloud.com

